How to Build a Tachometer: A Shocking Life-Changing Guide
Share
If you're a tech professional or an enthusiastic DIYer with a passion for engineering, you've likely thought about how to build a tachometer. This device, essential in various applications from automotive engineering to industrial machinery, can provide crucial insights into performance and efficiency. In this comprehensive guide, well delve into the steps, materials, and techniques you need to create your very own tachometer.
In case youre wondering why this is such a compelling project, the ability to measure the speed of a rotating object in real-time is not just practical but also surprisingly enlightening. It opens the door to a deeper understanding of mechanics and electronics, which could lead to remarkable innovations in your field. So, lets roll up our sleeves and get started on this journey!

Understanding the Basics of a Tachometer
Before diving into the construction, its crucial to grasp what a tachometer is and what it does. A tachometer is an instrument used to measure the rotational speed of an object, often expressed in revolutions per minute (RPM). It's commonly found in automotive dashboards, industrial machinery, and various technological applications.
Knowing how a tachometer functions will greatly assist you in creating one. There are typically two types of tachometers: analog and digital. Analog tachometers use mechanical components to measure speed, while digital tachometers utilize sensors and microcontrollers for accurate readings.
Materials You Will Need
Now that we understand the basics, lets prepare for our build. Heres a list of materials you will need:
- Microcontroller (like Arduino or Raspberry Pi)
- RPM Sensor (optical or hall effect)
- LCD Display or LED for output
- Power Supply (battery or wall adapter)
- Jumper Wires for connections
- Resistors and Capacitors for circuit stability
- PCB or Breadboard for mounting
- Enclosure to house your tachometer
Step-by-Step Guide to Building Your Tachometer
Now comes the exciting part: assembling your tachometer! Follow these steps to ensure a successful build:
1. Setting Up the Microcontroller
Your microcontroller is the brain of your tachometer. Begin by setting it up according to the manufacturer's instructions. Install any necessary software on your computer that will allow you to program the microcontroller. If you're using an Arduino, for instance, install the Arduino IDE. Connect your microcontroller to your computer via USB to upload code later.
2. Connecting the RPM Sensor
The RPM sensor is crucial for measuring the rotational speed. Depending on your sensor type (optical or hall effect), follow the appropriate wiring diagram and connect the sensor to the designated pins on your microcontroller. Ensure that you position the sensor in such a way that it can accurately read rotational speed.
3. Wiring the Display Unit
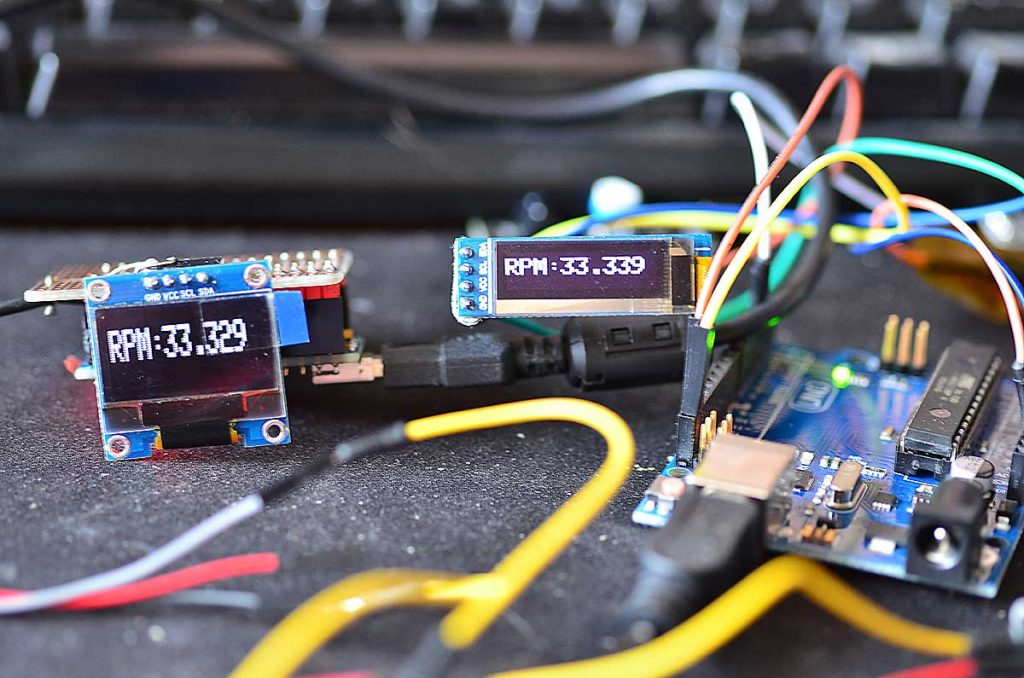
You need a clear display to read the RPM values. Connect an LCD or LED display to your microcontroller, following the instructions that come with your display unit. This is where you'll represent the values measured by the RPM sensor.
4. Coding the Microcontroller
The next essential step is programming the microcontroller to interpret the signals from the RPM sensor and display them on the LCD. Youll be writing code that transforms input from the sensor into RPM readings. There are extensive resources online, including scientific articles, that can help you with coding examples specific to your setup.
5. Testing Your Tachometer
Once your circuit is complete and your code is uploaded, its time for the moment of truth: testing! Power up your setup and observe whether the tachometer displays the correct RPM readings. If not, revisit your connections and code to diagnose any issues.
Applications of Your Custom Tachometer
After successfully building your tachometer, the possibilities are truly endless. You can use it for:
- Monitoring vehicle engine speed
- Measuring motor speeds in industrial applications
- Collecting data for integration with analytics tools, such as Power BI
- Enhancing hobby projects such as remote-controlled cars or drones
Maintaining and Troubleshooting Your Tachometer
Like any electronic device, your tachometer will require maintenance and occasional troubleshooting. Common issues include:
- Inaccurate readings due to poor sensor placement
- Display malfunctions due to loose connections
- Power supply issues affecting performance
It's essential to regularly check your wiring and ensure that the components are secure. Additionally, calibrating your tachometer can help maintain its accuracy.
Further Reading and Resources
For additional guidance and advanced techniques, refer to the following resources:
- What is a Tachometer?
- Understanding Tachometers
- Britannica on Tachometers
- Digital vs. Mechanical Tachometers
- Installing a Tachometer
- Tachometer Generators
- Identifying Tachometer Problems

Frequently Asked Questions
- 1. What is a tachometer used for?
- A tachometer measures the rotational speed of an object and is often used in vehicles and machinery to monitor performance.
- 2. Is it difficult to build a tachometer?
- While it requires soldering and coding skills, with the right resources, DIY enthusiasts and professionals can build a tachometer.
- 3. Where can I find more information on tachometers?
- You can consult online resources, scientific articles, and hardware manuals for extensive guidance on tachometers.
Building your own tachometer is a fascinating project that merges creativity and technical skills. As you embark on this journey, remember to enjoy the learning process. Happy building!
